
Table of Contents
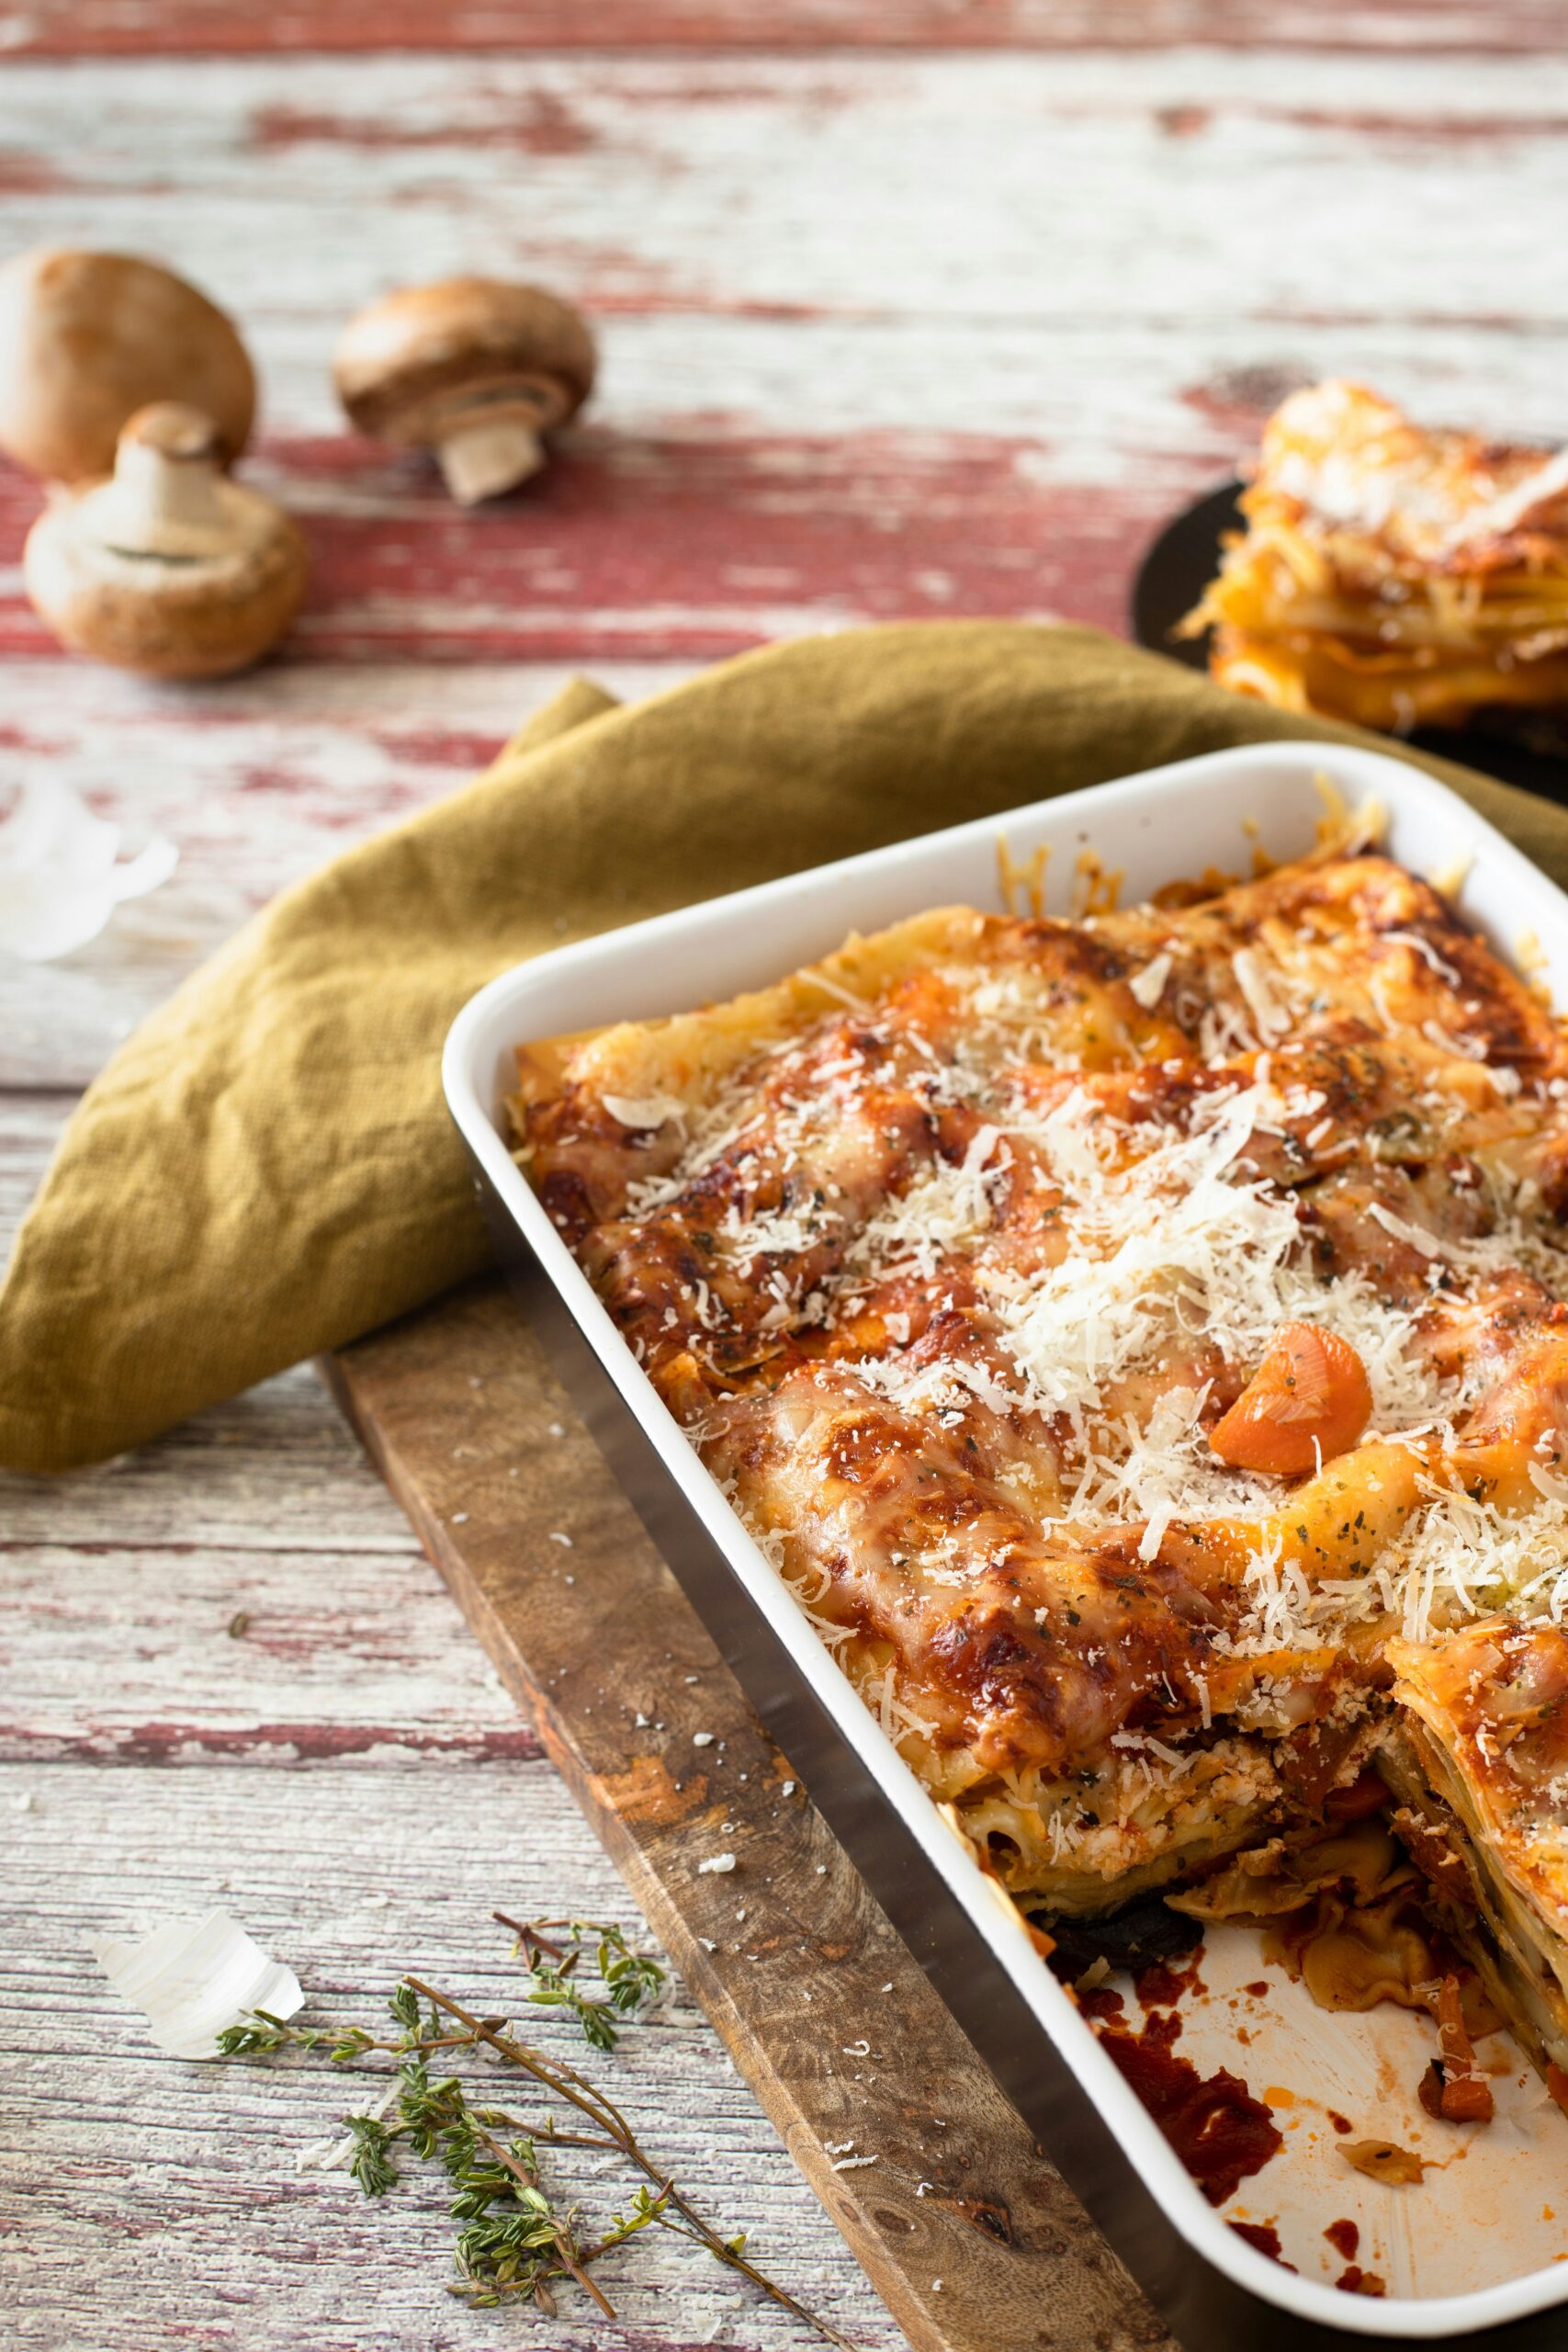
Are you craving the delectable flavors of sushi but want something easier to prepare? Salmon sushi bake is the perfect solution – a mouthwatering twist on traditional Japanese sushi that’s taking social media by storm. This innovative dish combines all the beloved flavors of salmon sushi rolls in a convenient, casserole-style format that’s perfect for sharing.
Imagine layers of perfectly seasoned sushi rice topped with tender salmon and a creamy, slightly spicy sauce, all baked until golden and bubbling. This fusion dish has become a sensation at potlucks, family gatherings, and dinner parties, offering all the satisfaction of traditional sushi without the rolling techniques required for making maki rolls.
Whether you’re an experienced home cook or just starting your culinary journey, this salmon sushi bake recipe brings restaurant-quality flavors right to your kitchen. The best part? You can prepare it in a fraction of the time it takes to make traditional sushi rolls, and it’s guaranteed to impress your guests with its stunning presentation and incredible taste.
What is Salmon Sushi Bake?
The Perfect Fusion of Comfort and Japanese Cuisine
Think of salmon sushi bake as the ultimate comfort food mashup – a creative deconstructed sushi dish that transforms traditional Japanese flavors into a warm, satisfying casserole. At its heart, this trendy dish is essentially a layered sushi creation that’s baked until hot and crispy on top, while maintaining the familiar tastes and textures that make sushi so irresistible.
Three Simple Layers of Flavor
Unlike traditional sushi rolls that require precise rolling techniques, salmon sushi bake features three main components that make it both approachable and delicious. The foundation starts with a layer of perfectly seasoned sushi rice, followed by succulent pieces of salmon, and topped with a rich, creamy sauce that becomes golden and bubbly in the oven. The result? A dish that captures the essence of your favorite salmon roll but in a format that’s perfect for serving a crowd.
Endless Customization Options
What makes this dish truly special is its versatility. You can easily customize the flavors and toppings to suit your taste preferences or dietary needs. Whether you prefer it extra spicy, loaded with additional seafood, or garnished with fresh vegetables, salmon sushi bake adapts to your creativity while maintaining its core appeal.
Creating a delicious Salmon Sushi Bake starts with gathering the right ingredients. Here’s everything you’ll need to make this crowd-pleasing dish, broken down into categories for easy preparation.
Ingredients You’ll Need
Creating a delicious Salmon Sushi Bake starts with gathering the right ingredients. Here’s everything you’ll need to make this crowd-pleasing dish, broken down into categories for easy preparation.

1. For the Sushi Rice
The base of your sushi bake is perfectly cooked sushi rice. Here’s what you’ll need:
| Ingredient | Quantity | Notes |
|---|---|---|
| Sushi rice | 2 cups | Short-grain rice works best. |
| Rice vinegar | 1/4 cup | Adds the classic sushi rice flavor. |
| Sugar | 2 tablespoons | Balances the vinegar’s acidity. |
| Salt | 1 teaspoon | Enhances the overall flavor. |
2. For the Salmon Layer
The star of the dish! You can use fresh or smoked salmon, depending on your preference.
| Ingredient | Quantity | Notes |
|---|---|---|
| Fresh or smoked salmon | 300g (10.5 oz) | Fresh salmon should be baked until flaky. |
| Soy sauce | 1 tablespoon | Adds umami flavor (use gluten-free if needed). |
| Sesame oil | 1 teaspoon | Enhances the salmon’s richness. |
3. For the Creamy Topping
This creamy, spicy layer ties everything together.
| Ingredient | Quantity | Notes |
|---|---|---|
| Japanese mayonnaise | 1/2 cup | Kewpie mayo is recommended for authenticity. |
| Cream cheese | 1/4 cup | Softened for easy mixing. |
| Sriracha | 1-2 tablespoons | Adjust to your preferred spice level. |
4. For Garnish and Toppings
Add texture and flavor with these finishing touches.
| Ingredient | Quantity | Notes |
|---|---|---|
| Furikake | 2 tablespoons | A Japanese seasoning blend for umami. |
| Nori sheets | 2-3 sheets | Cut into small pieces for serving. |
| Sesame seeds | 1 tablespoon | Optional, for added crunch. |
| Green onions | 2 stalks | Chopped, for a fresh finish. |
5. Optional Add-Ins
Customize your Salmon Sushi Bake with these optional ingredients:
| Ingredient | Quantity | Notes |
|---|---|---|
| Avocado | 1, sliced | Adds creaminess and freshness. |
| Cucumber | 1/2, diced | For a refreshing crunch. |
| Tobiko (fish roe) | 2 tablespoons | Adds a pop of color and texture. |
6. Kitchen Tools You’ll Need
To make the process seamless, ensure you have these tools ready:
- Baking dish (9×9 inches or similar)
- Mixing bowls
- Saucepan for cooking rice
- Whisk or fork for mixing
- Oven for baking
Step-by-Step Instructions: How to Make Salmon Sushi Bake

Preparing the Perfect Sushi Rice Base
- Rinse 3 cups of sushi rice thoroughly until the water runs clear
- Cook the rice according to package instructions, typically using a 1:1 ratio of rice to water
- While still hot, season with a mixture of:
- 1/3 cup rice vinegar
- 2 tablespoons sugar
- 1 teaspoon salt
- Gently fold the seasoning into the rice using a cutting motion to avoid making the rice mushy
- Let it cool slightly before spreading evenly in a 9×13 inch baking dish
Preparing the Salmon Layer
- Preheat your oven to 375°F (190°C)
- Season 1 pound of salmon fillets with:
- Salt and pepper
- A light drizzle of soy sauce
- Bake for 12-15 minutes until just cooked through
- Let it cool slightly, then flake into small pieces using two forks
- Remove any skin and bones during this process
Creating the Creamy Topping
- In a mixing bowl, combine:
- 1 cup Japanese mayonnaise (Kewpie)
- 8 oz softened cream cheese
- 2 tablespoons Sriracha (adjust to taste)
- 1 tablespoon soy sauce
- Mix until smooth and well combined
- If the mixture is too thick, thin it slightly with a tablespoon of warm water
Assembling Your Sushi Bake
- Layer your ingredients in this order:
- Spread the prepared sushi rice evenly in the baking dish
- Sprinkle a layer of furikake over the rice
- Add the flaked salmon in an even layer
- Spread the creamy mixture on top
- Finish with another generous sprinkle of furikake
The Final Bake
- Preheat oven to 375°F (190°C)
- Bake for 20-25 minutes until the top is lightly golden
- Switch to broil for the final 2-3 minutes to achieve a beautiful golden-brown crust
- Watch carefully during broiling to prevent burning
Serving Your Creation
- Let the dish rest for 5 minutes after baking
- Garnish with:
- Sliced green onions
- Extra furikake
- Sesame seeds
- Serve hot with:
- Nori sheets for wrapping
- Sliced cucumbers
- Soy sauce on the side
Frequently Asked Questions (FAQs)
Here are answers to some of the most common questions about making Salmon Sushi Bake. Whether you’re a beginner or looking to perfect your recipe, these FAQs will help you navigate the process with ease.
1. Can I use canned salmon instead of fresh or smoked salmon?
Yes, you can use canned salmon as a convenient alternative. However, fresh or smoked salmon is recommended for the best flavor and texture. If using canned salmon, make sure to drain it well and remove any bones or skin before mixing it into the recipe.
2. Can I make Salmon Sushi Bake ahead of time?
Absolutely! You can prepare the components ahead of time and assemble them just before baking. Store the cooked sushi rice, prepared salmon, and creamy topping separately in airtight containers in the refrigerator. When you’re ready to serve, assemble the layers and bake as directed.
3. How do I store leftovers?
Store any leftovers in an airtight container in the refrigerator for up to 2 days. To reheat, place the sushi bake in the oven at 350°F (175°C) for 10-15 minutes or until warmed through. Avoid microwaving, as it can make the rice too soft.
4. Is Salmon Sushi Bake gluten-free?
It can be! To make this dish gluten-free, ensure that all your ingredients (such as soy sauce and mayonnaise) are gluten-free. Use tamari instead of regular soy sauce, and check the labels of other condiments to confirm they’re gluten-free.
5. Can I make this dish spicier or milder?
Yes, the spice level is completely customizable. Adjust the amount of sriracha or spicy mayo in the creamy topping to suit your taste. For a milder version, you can omit the sriracha entirely or replace it with a small amount of sweet chili sauce.
6. What can I serve with Salmon Sushi Bake?
Salmon Sushi Bake is a complete dish on its own, but you can pair it with:
- Miso soup
- A side of pickled ginger or wasabi
- A fresh cucumber salad
- Extra nori sheets for scooping
7. Can I use a different type of fish?
Definitely! While salmon is the star of this recipe, you can experiment with other fish like tuna, crab, or even cooked shrimp. Just make sure the fish is cooked and flaked before layering it into the dish.

Conclusion: Master Your Salmon Sushi Bake Adventure
Creating the perfect salmon sushi bake is more than just following a recipe – it’s about bringing together the best of Japanese flavors in a modern, shareable format that everyone will love. With this detailed guide, you’re now equipped to make this trending dish right in your own kitchen, whether it’s for a cozy family dinner or a show-stopping party centerpiece.
Remember, the beauty of salmon sushi bake lies in its flexibility. Don’t be afraid to experiment with different toppings, adjust the spice levels, or try new combinations to make it truly your own. The basic formula we’ve shared today is just the beginning of your sushi bake journey.
Looking to Take Your Sushi Bake to the Next Level?
Consider trying these creative variations:
- Add a layer of spicy crab mix for an extra seafood kick
- Incorporate diced mango for a sweet-savory twist
- Top with fresh avocado after baking for added creaminess
- Experiment with different types of salmon, from fresh to smoked
We’d love to hear about your salmon sushi bake adventures! Share your creations with us in the comments below, and don’t forget to save this recipe for your next gathering. For more exciting Asian-fusion recipes and cooking tips, be sure to subscribe to our newsletter and follow us on social media.
Happy baking, and いただきます (itadakimasu)!

Pingback: All You Can Eat Sushi: Guide to Enjoying Unlimited Sushi